Customizing snap zones
Updated on
March 21, 2023
In this VR Builder tutorial, you will learn how to customize the look and feel of snap zones and how to interact with them.
- Setting up the scene in Unity
- Positive vs. negative validation system for snap zones
- Changing the look and feel of snap zones
- Modifying the interaction with snap zones
- Next Steps

Setting up the scene in Unity
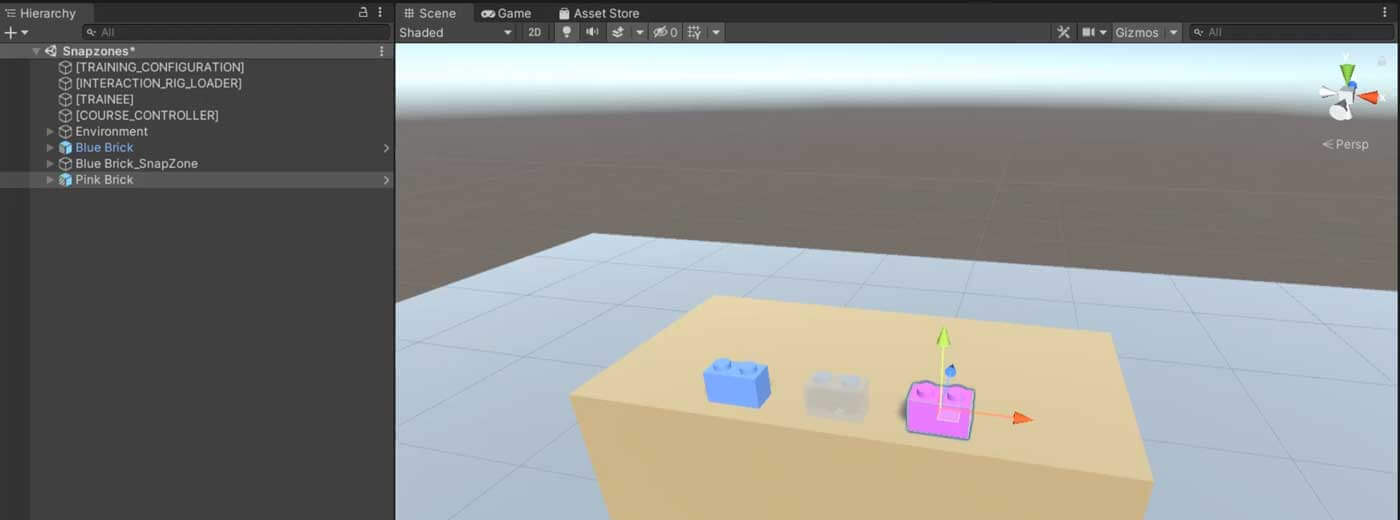
This Unity scene is the same as in the introductory tutorial on snap zones, in which you learned how to grab and place objects in VR. If you did not see the introduction to snap zones tutorial, we strongly recommend that you do so before continuing. Please note that unlike as in the introduction to snap zones tutorial, we deleted the step of grabbing the brick, as this step is not necessary for today's tutorial. We also added a second brick - a pink brick - to this Unity scene. This brick is made interactable by adding the grabbable and snappable properties. In case you don't know how to do so, please read the introductory tutorial about snap zones first.
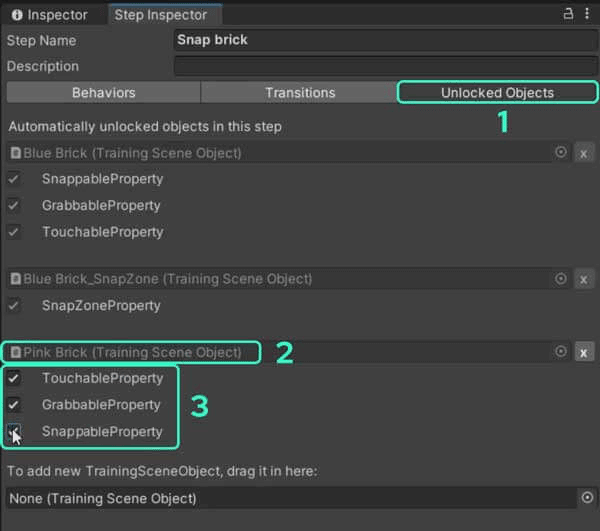
To make the pink brick interactable, we must unlock it, as VR Builder by default locks interactions with the object that are not used in the current step. To do so, go to Step Inspector > Unlocked Objects. Then add a new TrainingSceneObject by referencing the pink brick. Afterwards, check the boxes for the TouchableProperty, GrabbableProperty and SnappableProperty to make the object touchable, grabbable and snappable.
Finally, after setting up the Unity scene, we have two bricks to interact with: a blue one and a pink one.
Positive vs. negative validation system for snap zones
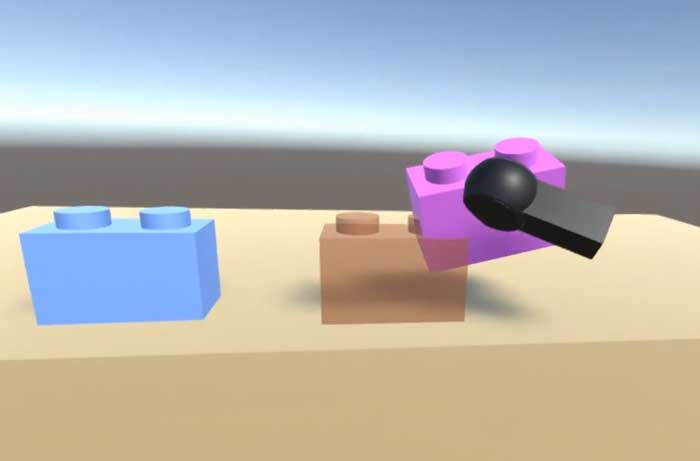
Negative validation system
A negative validation system is triggered when an incorrect object is placed in the snap zone. The material of the ghost object changes to the Valid Hover Material (which is the red transparent material by default). For example, if you place the pink brick in the Blue Brick_SnapZone instead of the blue brick, the snap zone will turn red. A negative validation also means that the pink brick will not snap when you release it in the Blue Brick_SnapZone. Instead, it then simply drops to the ground.
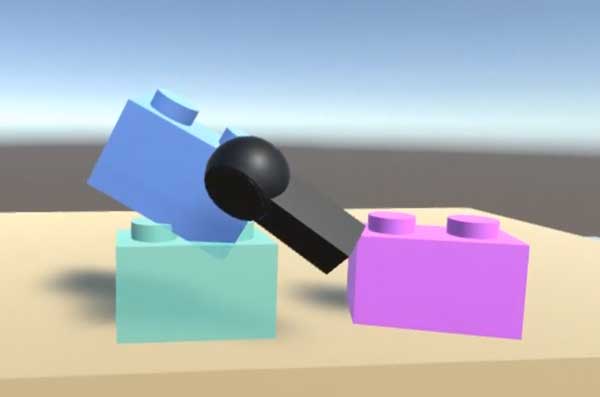
Positive validation system
The positive validation system indicates that the correct object has been placed in the snap zone. The material changes to the "Valid Hover Material" (which is the green transparent material by default). For example, if you grab the blue brick and place it in the snap zone for the blue brick, the green highlight is activated. When you release the brick, it snaps into place.
Changing the settings of snap zones in Unity
In the current Unity scene, there are three distinct snap zone validation materials:
- The snap zone highlight material of the ghosting object is blue, indicating that there is neither a valid nor an invalid object within the snap zone
- The invalid hover material is highlighted in red
- The valid hover material is highlighted in green
It is possible to change the settings of these snap zones.
Changing the look and feel of snap zones
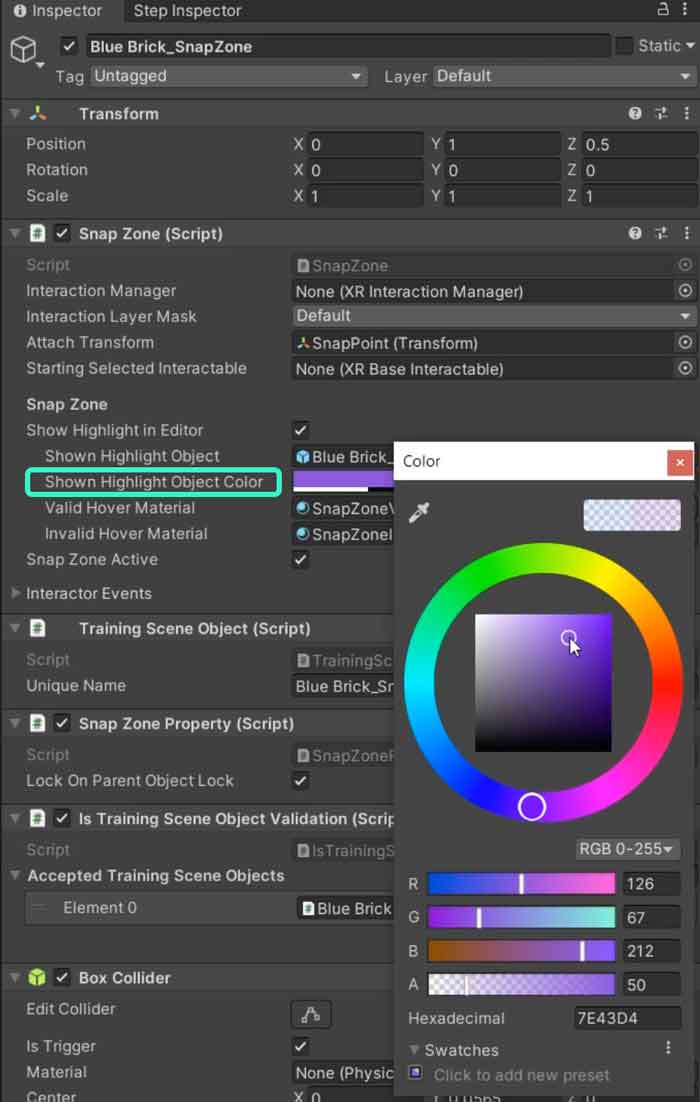
You can change the appearance of a particular snap zone directly in the Inspector tab. For example, to change the color of the blue ghost object, select it and choose another highlight color, e.g. purple.
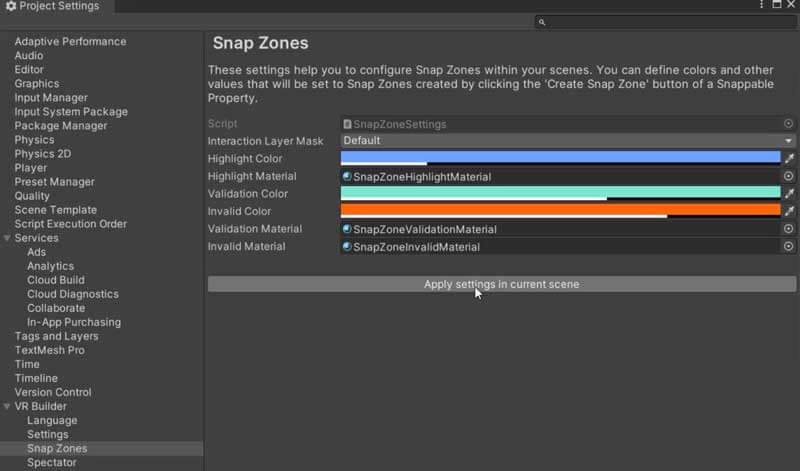
If you want to change not only one snap zone, but all existing snap zones of your Unity project at once, you can do so by going to Tools > VR Builder > Settings > Snap Zone Settings.

Like this, it is possible to customize the material, color, and transparency (alpha channel) of the snap zones to your requirements. The changes you make will already apply to the next snap zone you create. If you want to change all existing snap zones at once, you can do so using the Apply settings in current scene button. This will update all existing snap zones in the current Unity scene.
Modifying the interaction with snap zones
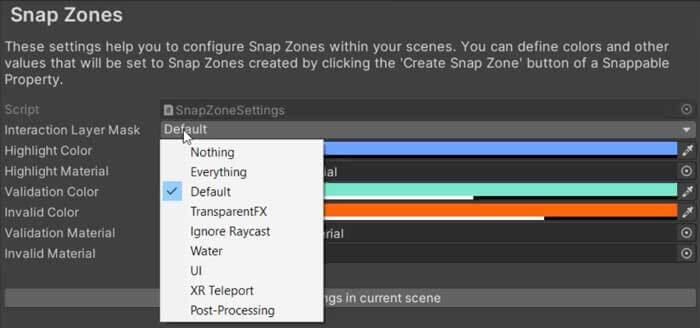
To change how you can interact with snap zones, you can simply change the interaction layer mask, as the snap zone will only interact with objects in the specified layer. You can change the interaction layer mask of your snap zones in two different ways: First, you can access the VR Builder settings as just before: Tools > VR Builder > Settings > Snap Zone Settings. Currently, the mask is set to the default layer.
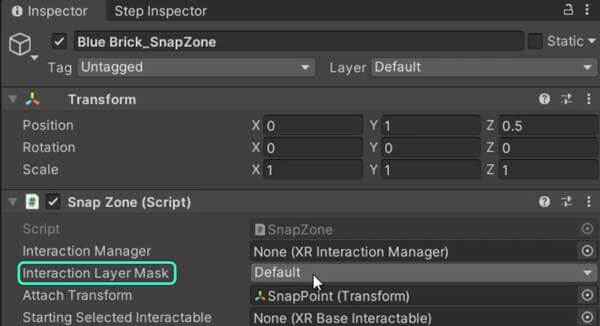
Instead of making these changes in the VR Builder settings, you can make changes to the snap zone manually in the Inspector tab.
Next steps
In this VR Builder tutorial you have learned, among other things, how to create a snap zone validation system. We have seen that it is possible to make the snap zone accept certain objects and reject others. But what if you want to snap multiple objects into the same snap zone? Check out the tutorial for creating snap zones for multiple objects!