HTC Vive device setup
Updated on
October 20, 2023
In this VR Builder tutorial, you will learn how to set up VR Builder for running VR applications standalone on HTC Vive devices. To build the VR app in Unity, we will go through the following steps.
- Setting up VR Builder for HTC Vive
- Setting up standalone HTC Vive headsets
- Building the project
- Next steps
Setting up VR Builder for HTC Vive
To follow this tutorial, you will need a compatible Unity version with Android support and a HTC Vive device with USB debugging enabled.
Import VR Builder and proceed with the Setup Wizard. Continue through the wizard until you reach the VR Hardware Setup page, then select HTC Vive and proceed. Additional information on how to set up VR Builder you can find in our setup guide tutorial.
This automated setup will allow you to use your HTC Vive headset tethered using the Vive Streaming Hub application, to quickly check progress in your application directly in Unity.
In the next section we will configure Unity to build apps for standalone HTC Vive headsets.
Setting up standalone HTC Vive headsets
HTC provides a OpenXR extension package that adds support for Vive headsets.
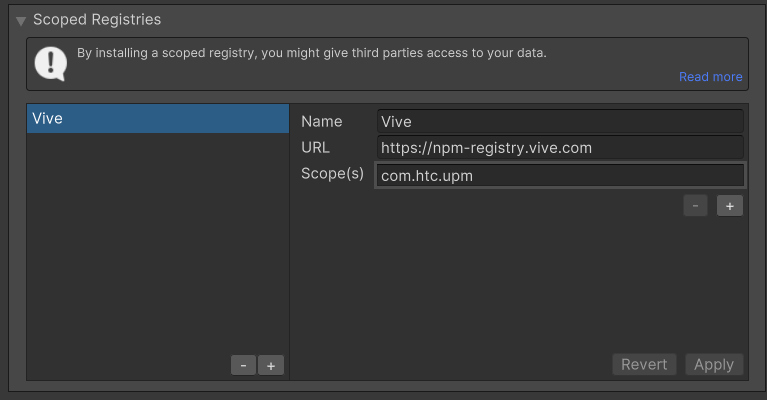
To access the package, you’ll need to add the corresponding package registry to your project. Open Project Settings > Package Manager and add a registry with the following info, then click Apply.
Name: Vive
URL: https://npm-registry.vive.com/
Scope(s): com.htc.upm
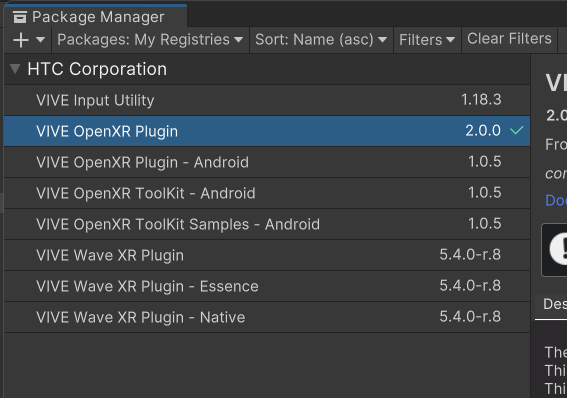
You will then be able to access the registry from the Package Manager. Open the Package Manager and from the dropdown on the top left select “My Registries”. The HTC registry should appear. From it, install the “Vive OpenXR Plugin” package.
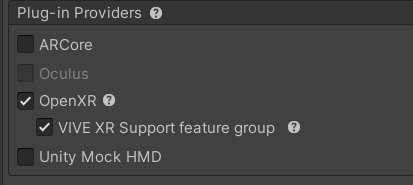
Now configure your headset. Open the XR Plugin Management on the Android tab and select OpenXR and Vive XR Support feature group. Also review the warnings in the OpenXR project validation and fix them accordingly. For example, you will need to set the Scripting Backend to IL2CPP in the player settings, then select ARM64 as the Target Architecture.
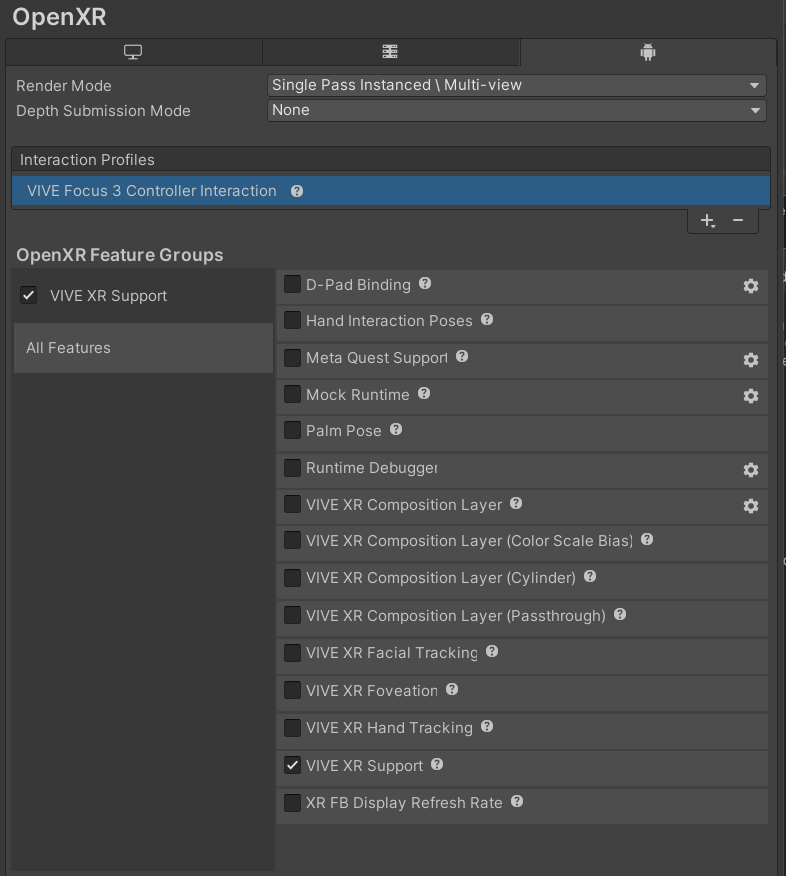
Then, click on the OpenXR sub-page and check Vive XR Support. You will also need a controller profile, select Vive Focus 3 Controller Interaction.
Your project is now configured for building standalone applications on HTC Vive headsets!
Building the project
Ensure you have selected Android as the build platform, and that your HTC Vive device is connected and selected in the Build window.
Also ensure to add the desired scenes to the list of built scenes at the top of the window. Finally, press Build and Run to run the app on the device. Once the build is complete, it will start automatically once the headset wakes up.
Next steps
In this VR Builder tutorial, you learned how to set up VR Builder for running VR applications standalone on HTC Vive devices. This means that you are now ready to build and run your VR apps in Unity. Kickstart your VR development in Unity with our tutorial on the VR Builder Process Editor!